| Analytics , Power BI ,

Embedding dashboards/reports and visualizations into your applications facilitates more data driven insights and adds more value to your applications, portals and services. Recently, we assisted one of our clients embed a Power BI report into another web application and restrict the data in the report to a specific user group. In this blog we have provided a step by step approach as to how we went about it and how the data was restricted in the Power BI Embedded report using RLS feature.
Power BI Embedded is a PaaS (Platform-as-a-Service) analytic solution in Microsoft Azure which provides ISV’s (Independent Software Vendors) and developers the ability to quickly incorporate visuals, reports, and dashboards into another application.
Row Level Security (RLS) in Power BI is used to restrict users’ access to data in Dashboards, Tiles, Reports and Datasets.
Pre-Requisites
You will need Power BI Desktop, a Power BI Pro account, Postman software and Visual Studio(Latest version) which will be used for creating and sending http requests. This is very convenient to quickly test APIs.
Publishing RLS Power BI Report in a new Workspace
Step 1: Create a Power BI Report with Dynamic RLS Capability and publish the report to the Power BI common workspace WITHOUT assigning roles to the users of the report.
To know how to create a Power BI report with dynamic RLS, refer to this blog
Step 2: Registering application in Azure Active Directory
1.To register an application for Power BI, go to https://dev.powerbi.com/Apps. Sign in using your Power BI Credentials and complete Step 1.

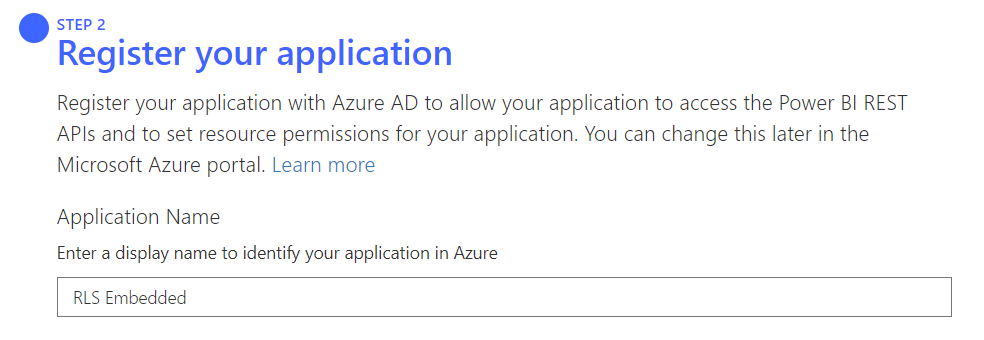
2.Now Choose step 2 and enter the exact Application name as used in the Power BI Dashboard
3. Choose the application type to register the application in Azure AD Directory
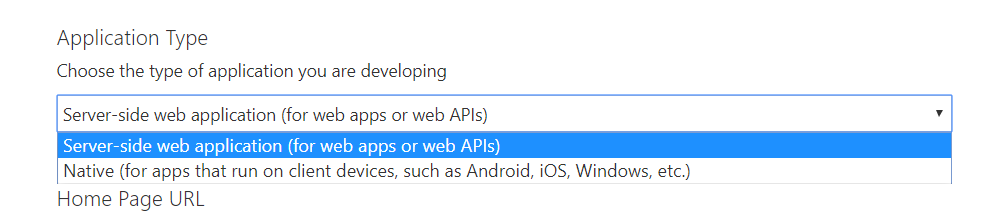
NOTE: The client services for Native requires a Master Account and the server-side web application requires a Principal Account to register the application in Azure Directory
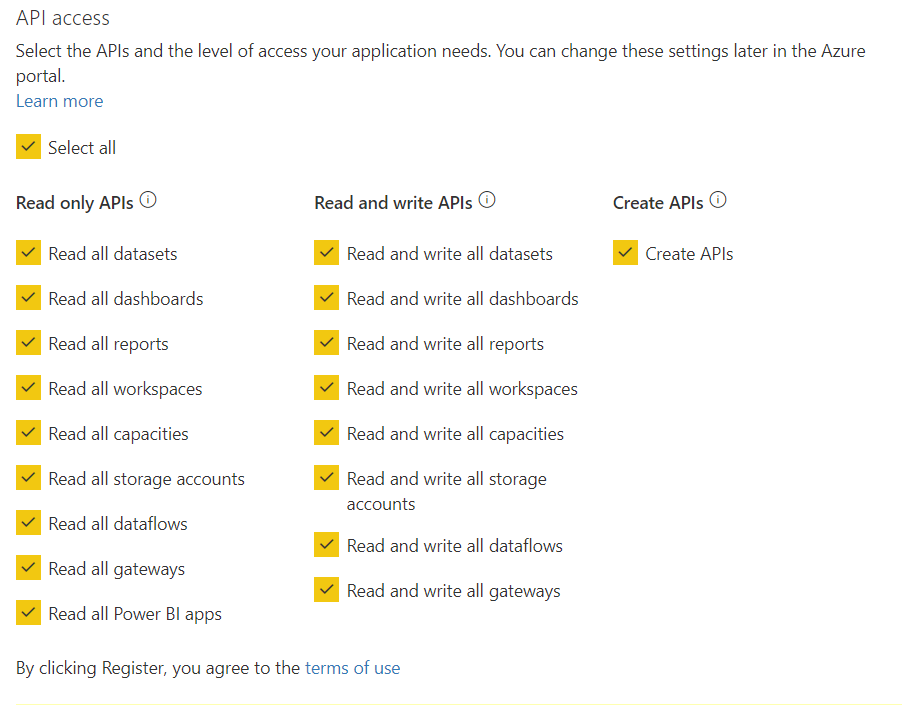
4. Select the APIs and the level of access your application needs. Power BI permissions give an application the ability to take certain actions on behalf of the user. All permissions must be approved by the user in order for it to be valid. Once done, select “Register” to register the application.
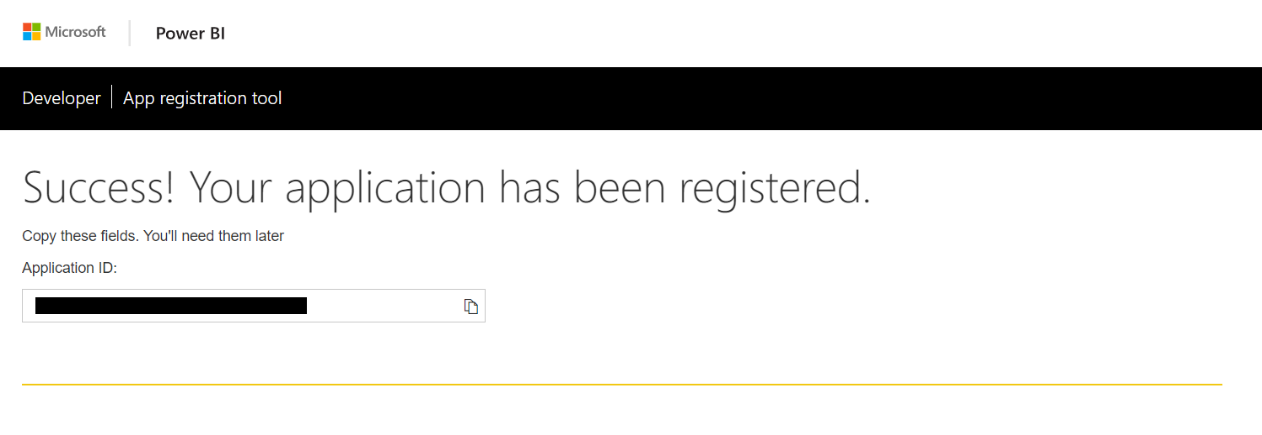
5. Once registered, you will get an Application Id and Application Secret (only for Server-Side Web Application) as shown below.
 Step 3: Generate an Access Token for the Power BI Report
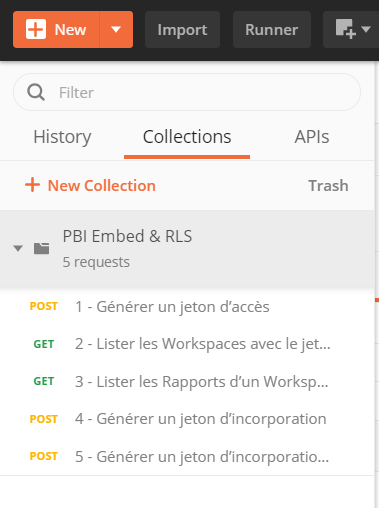
This is to enable API access from the Power BI application created and to verify its rights. Download the file and load it to the Postman App. Once the file is loaded you will get a screenshot as shown below.
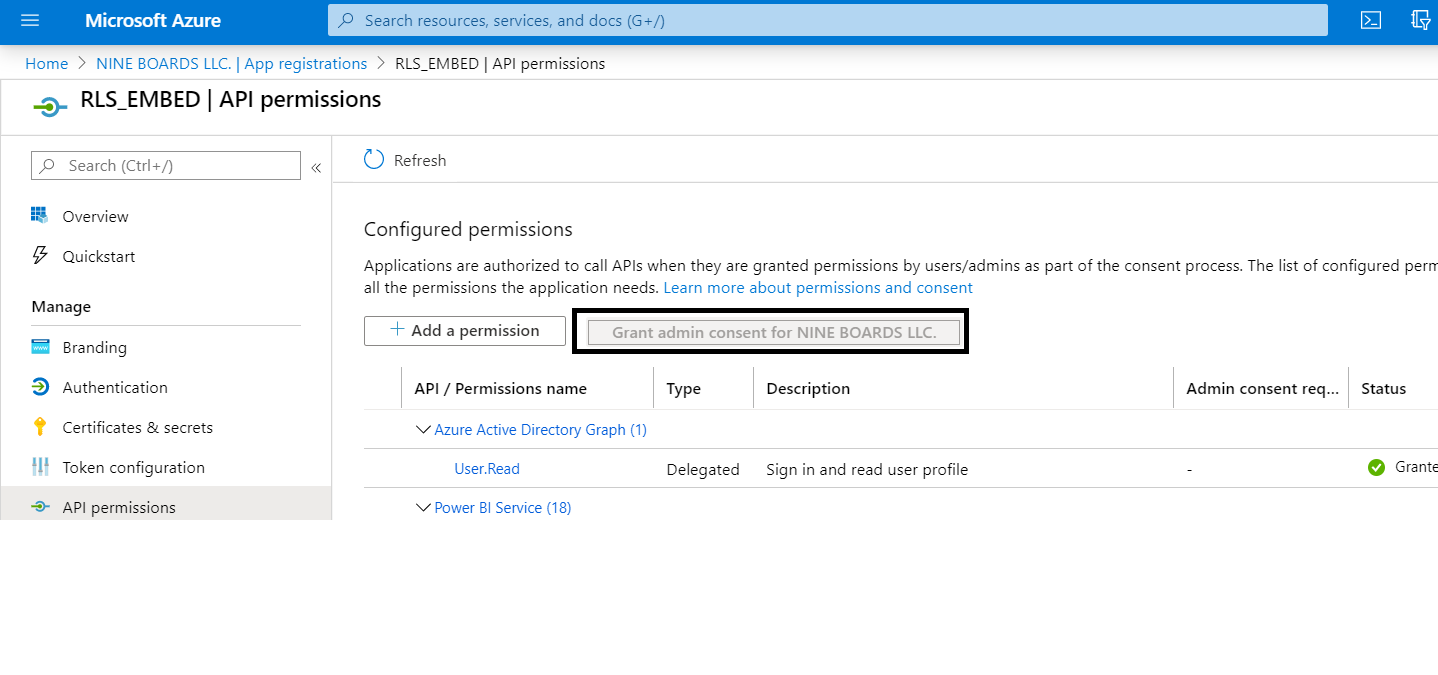
Step 4: Now login into Microsoft Azure and select Active Directory > App registration and select the app which you registered before. Select the API Permissions and click on “Grant Admin Consent”.
Step 5: Now fill the credentials as shown below in the Postman app by going to First Tab> Headers and then click on Send to get the access token for the Power BI Report.
Client ID & Secret: Enter the Client_ID and Secret which you received while registering the application. You can find it in Azure Active Directory>App Registration>App Name. If you choose the Native in App Registration, you don’t have to enter the client_secret.
User Credentials: Your Power BI username and password
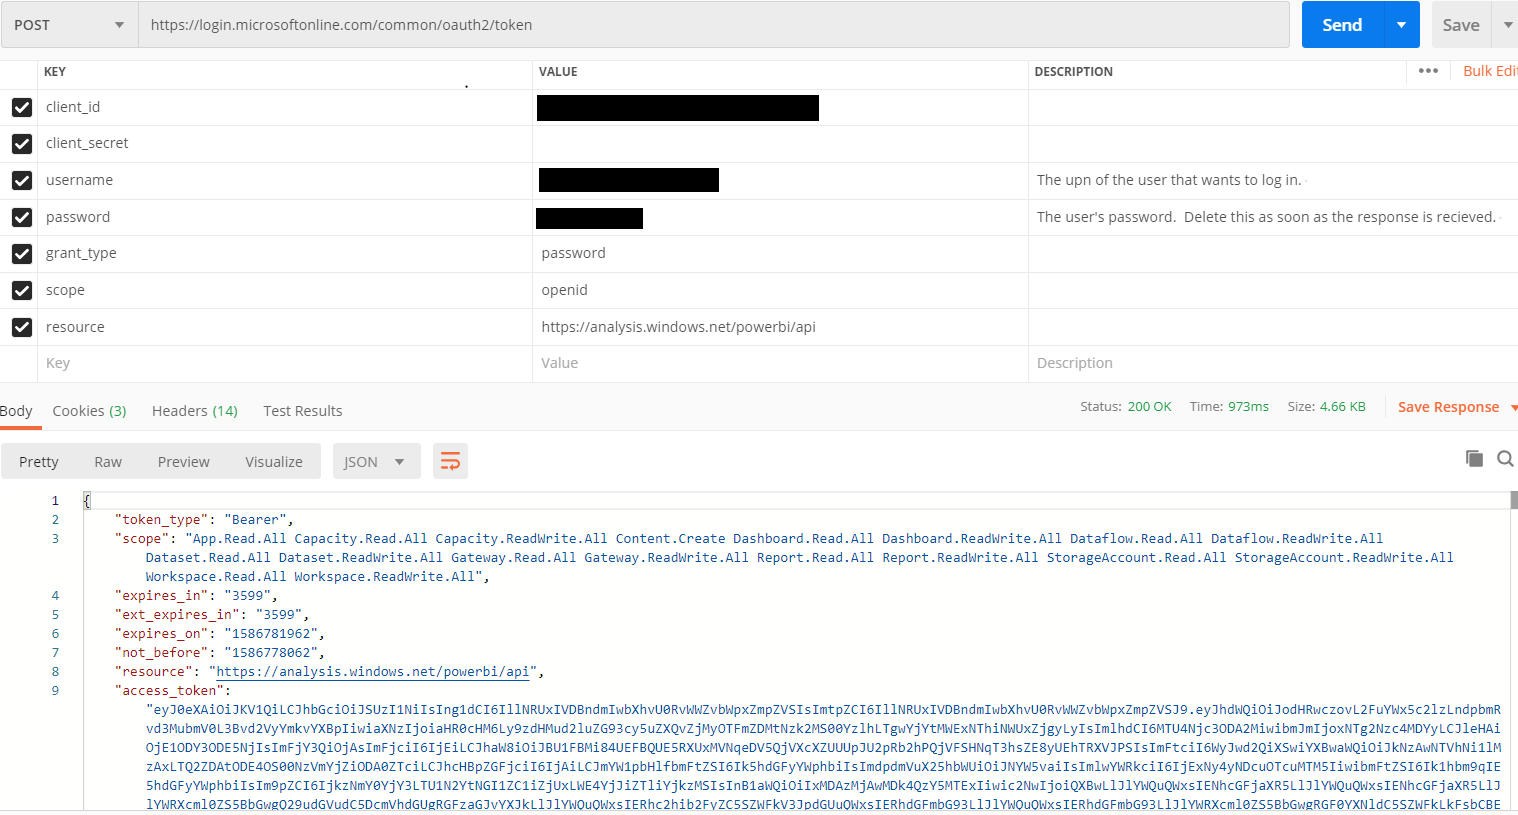
Save the “access token” value. We will use this access token for our next steps.
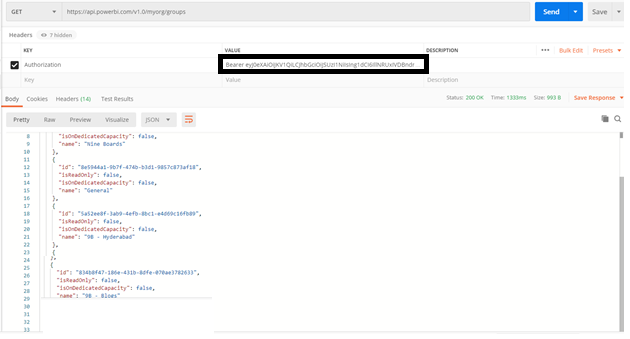
Step 6: Generate the Tokens for Workspace and Reports
Select Tab 2 > Headers and replace the value of the authorization key (“Bearer” + “access token”) and click on Send to get the Workspace IDs.
Step 7: Open Tab 3 and change the ID of the Workspace in the address and replace the value of the authorization key (“Bearer” + “access token”).
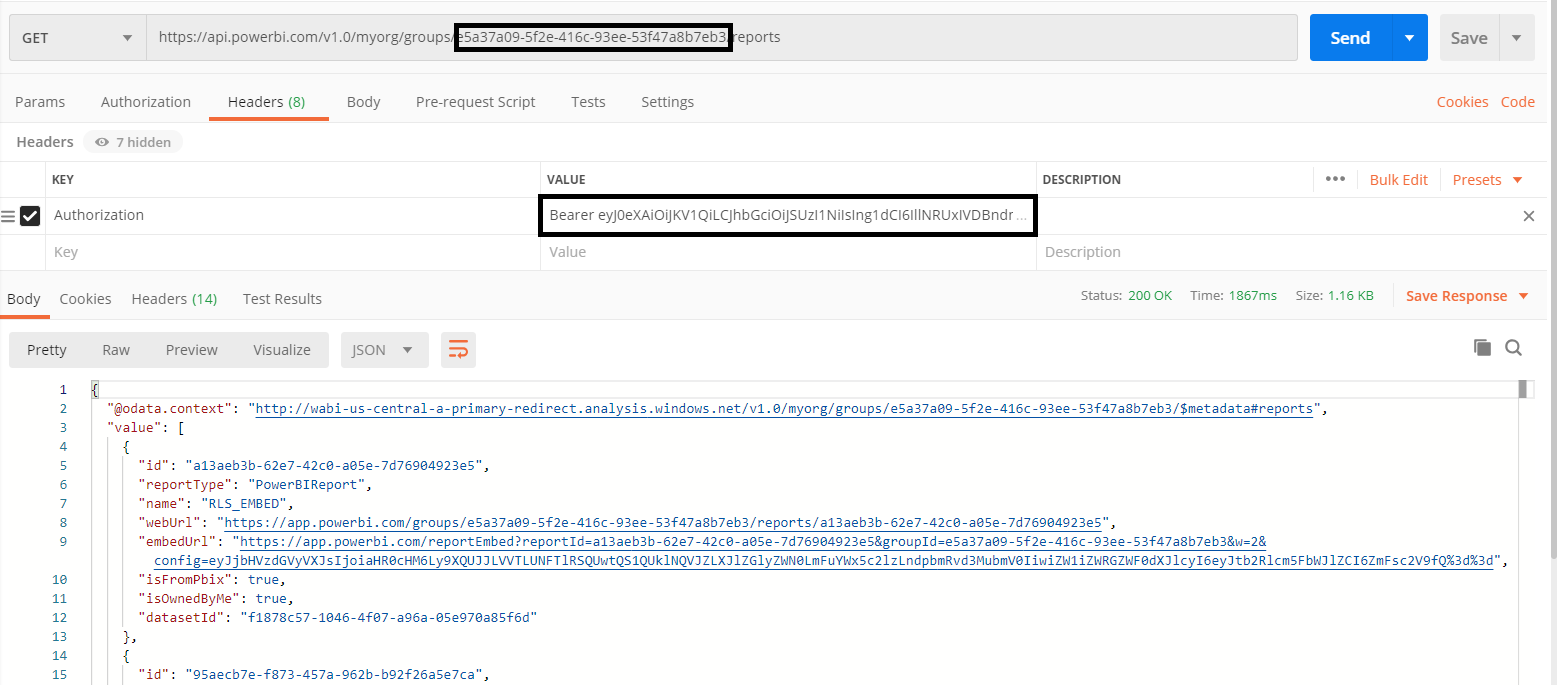
Save the ID of the report, the dataset (dataset ID) and its integration url (embedurl).
Step 8: Generate an Embed Token. Open Tab 4 and change the IDs of the Workspace and Report to “https://api.powerbi.com/v1.0/myorg/groups/{WorkspaceId}/reports/{ReportId}/generatetoken” and replace the value of the authorization key ( “Bearer” + “access token”).
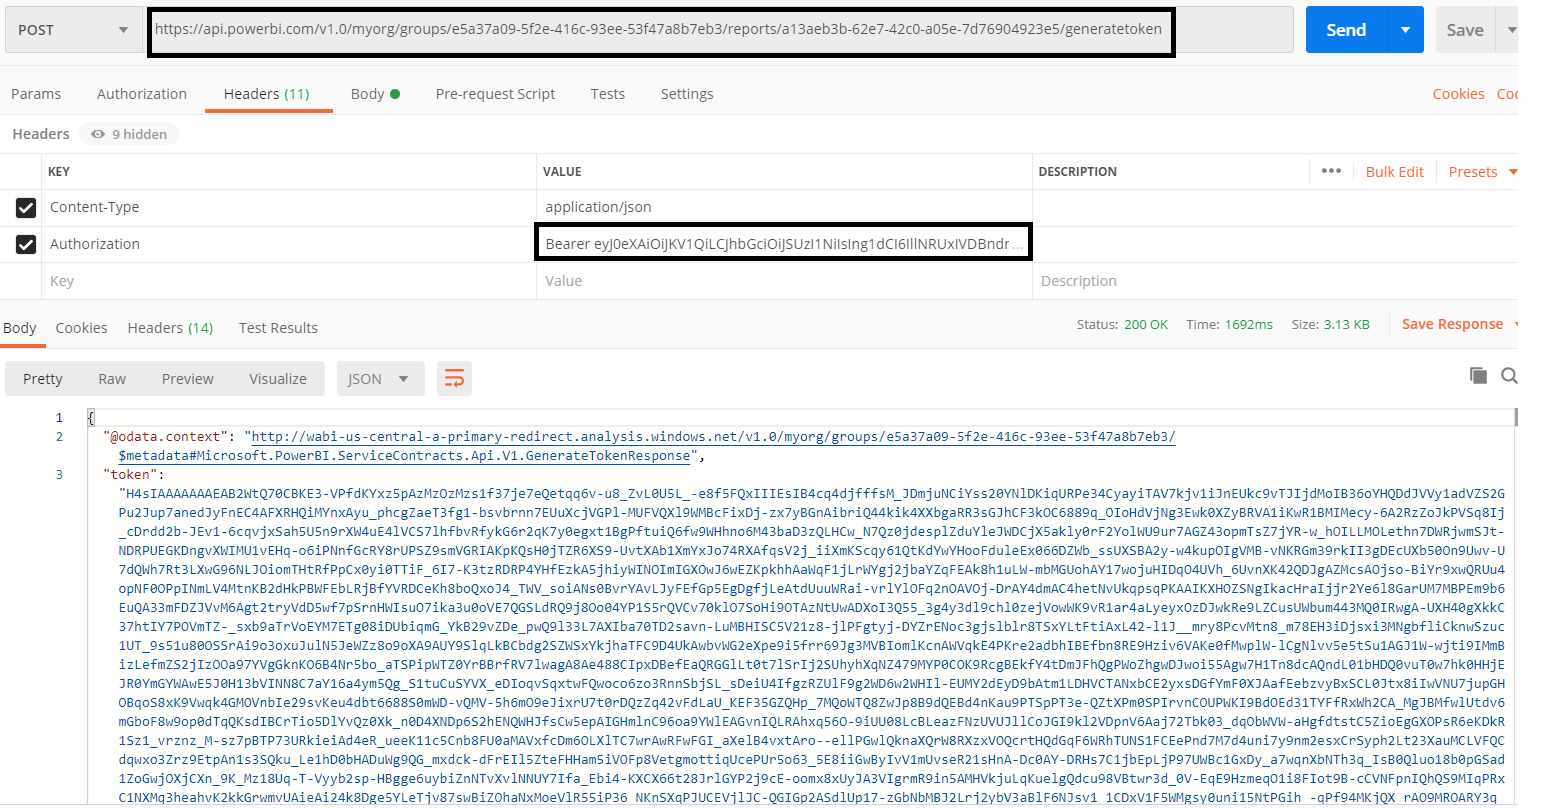
Finally save the Embedded Token
Alternate Way
You can also skip Tab2 and Tab3 steps and copy the Workspace and Report ID from your Power BI Service and replace them in the link shown below and the value of the authorization key (“Bearer” + “access token”).

For the Dataset ID , goto Workspace>Datasets>Settings and get the link as shown below

Step 9: Test Report in Power BI Embedded Playground
You can test the access to the report from an external website using the Microsoft Power BI Embedded Playground
Choose test “Sample Report” and enter the parameters: Embed Token, Embed Url, Report Id
Step 10: Now that we have successfully integrated a report, generate a token to integrate the Power BI content with RLS. Open Tab 5 and change the IDs of the Workspace and Report “https://api.powerbi.com/v1.0/myorg/groups/{WorkspaceId}/reports/{ReportId}/generatetoken”, copy the value of the authorization key ( “Bearer” + “access token”) and change the username ,dateset ID and Roles (Role which was created with Dynamic RLS) in the body as shown below
{

"accessLevel": "View",

"allowSaveAs": "false",

"identities": [{

"username": "manojn@nineboards.com",

"roles": ["DYNAMIC_RLS"],

"datasets": ["f1878c57-1046-4f07-a96a-05e970a85f6d"]

}]

}
You have now generated the embedded token with RLS restriction. Now go to Power BI Embedded Playground link and replace the embed token with the new token and select Run to get the result.
Now that you have learnt how to embed Power BI reports using dynamic RLS, check out our blog on embedding Power BI into External Applications. To know more about embedding Power BI reports contact us at info@nineboards.com.